Notification Methods
Notification Methods are the medium through which you are notified regarding problems detected by the Opsview Cloud software.
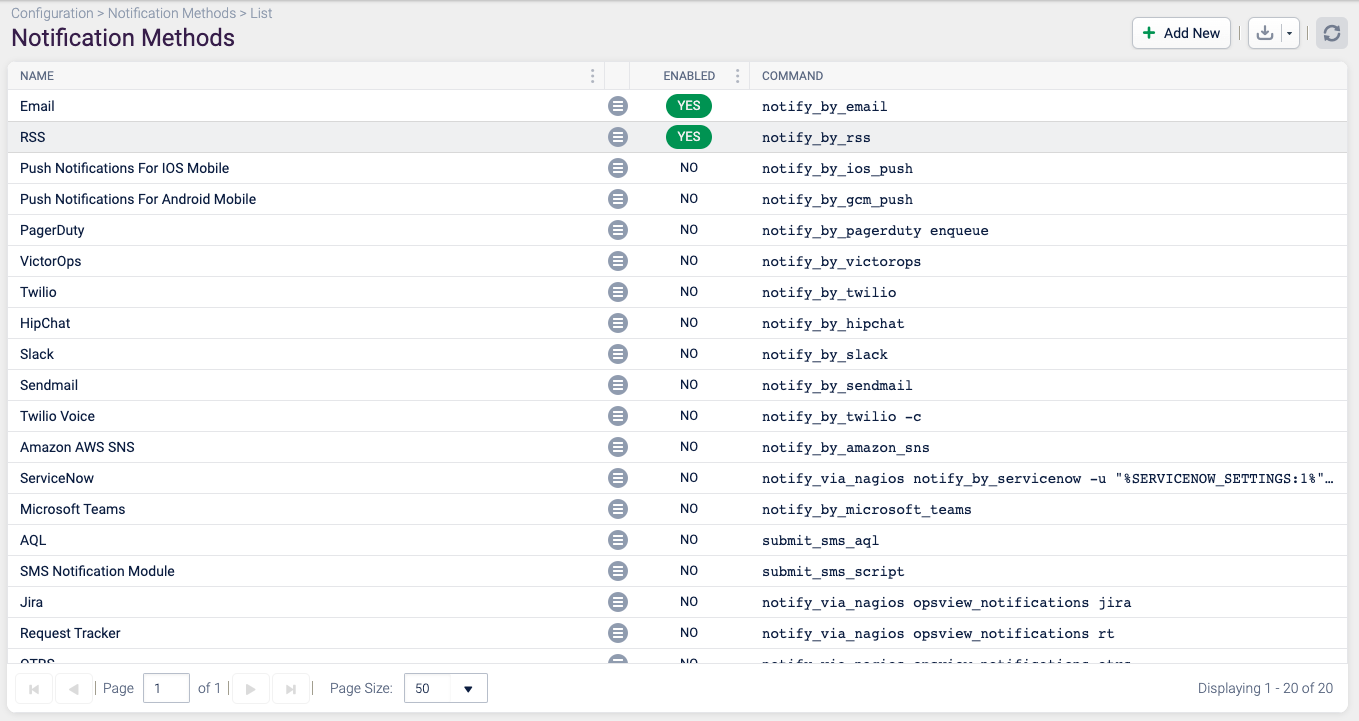
By default, Opsview Cloud ships with the following Notification Methods and their setup is accessible on the Configuration > Notification Methods page.
Configuring Notification Methods Copied
Some of these notifications require modification, i.e. the Push methods require a Username and password, Slack requires a Webhook URL and so forth. The modification of the Notification Methods is done via Configuration > Notification Methods.
Notification Method ‘Run On’ option Copied
On a system with clusters configured, each notification method has a ‘Run On’ option. This option allows you to specify whether the notification method is run on:
- Orchestrator
- Collector
Some methods, such as ‘Service Desk Connector’ must be set to Orchestrator.
Take note of the following:
- The advantage of running notifications from a Collector is that it is autonomous from the Orchestrator.
- If you select Collector and the host that wants to send a notification is monitored by the Orchestrator server, then the notification will be sent from the Orchestrator server.
- If you select Collector, you can configure which Monitoring Cluster will send BSM notifications for each BSM Service or BSM Component using the Notify Via option.
- If a service is monitored by a Collector but the notification method is set to the Orchestrator, then the details of the notifications will be transferred to Orchestrator to be notified on.
- There may be firewall restrictions to running a notification from a Collector.
Sent Notifications are visible in the Notifications View.
Email Copied
This sends an email to the email address specified.
Note
If the mail relay server does not advertise UTF-8 support, it may block emails sent by Opsview that contain non-ASCII UTF-8 characters.
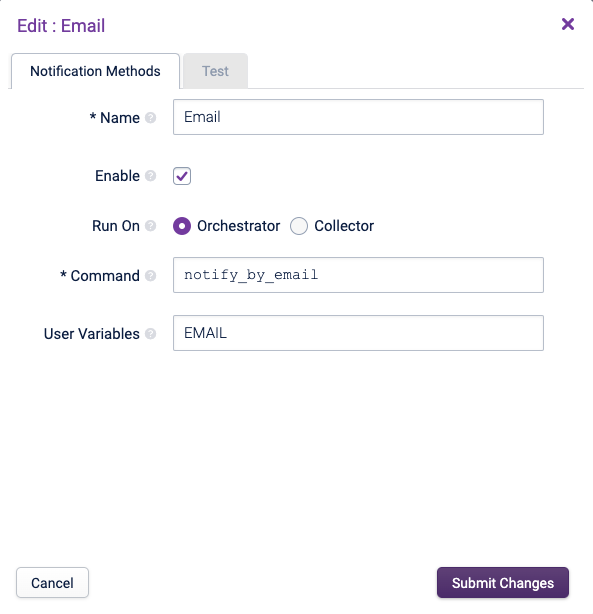
The email Notification Method requires minimal configuration:
- Name: A name for the Notification Method.
- Enable: Tick that box to make the Email Notification Method available to use when creating Notification Profiles. Submitting a change to this checkbox will require running Apply Changes from the Configuration menu.
- Run on: to set the system to send alerts either via the Orchestrator or the Collector servers (this can be useful if you have different configurations for postfix, sendmail, etc on your Collector servers than your Orchestrator).
- Command: This is the script to execute. It is assumed that this script is stored in
/opt/opsview/monitoringscripts/notifications. Add any command arguments as required if modifying the Notification Method . - User variables: ‘EMAIL’ is the name of a Variable that will be passed to the notify_by_email script and its value is the destination E-mail address for the Notification that will be defined in the User profile setup on the Configuration > Users and Roles > Users page.
The 'notify_by_email' command will use the configuration defined on the local server; be it the Orchestrator or the Collector server. The local email server configuration can be one of many including:
- Postfix
- Sendmail
- Zimbra
Note
The default mail script'notify_by_email'uses mail binary path'/usr/bin/Mail'. Please correct the script to point to a valid mail binary if required. You can find the script here:/opt/opsview/monitoringscripts/notifications/notify_by_email.
Simply ensure that the local mail server is configured correctly and can successfully deliver emails to email addresses. Generally configuring the local email server as a simple relay Host is sufficient, i.e. setting 'relayHost = mail.company.com' for example (For postfix: /etc/postfix/main.cf )
To change the ‘sender address’ for email notifications, simply modify /etc/mailname for the domain section (i.e. right of ‘@’). To modify the User/account section, i.e. ‘opsview@’, follow the specific guides for your email server of choice. In postfix, you can adjust this using the ‘sender_canonical_maps’ configuration parameter.
The email templates are written in Template Toolkit and exist at /opt/opsview/monitoringscripts/notifications/com.opsview.notificationmethods.email.tt and /opt/opsview/monitoringscripts/notifications/com.opsview.notificationmethods.email.opsview.tt.
Warning
Do not edit the/opt/opsview/monitoringscripts/notifications/com.opsview.notificationmethods.email.ttandcom.opsview.notificationmethods.email.opsview.ttfiles, as any changes you make will be overwritten and lost. Instead, follow the instructions at Custom Email Templates.
Custom Email Templates Copied
Please contact ITRS Opsview Support for assistance in getting your custom email template imported to your environment.
RSS Copied
This publishes the problems as an RSS feed on a per User basis. Access to the RSS feed requires authentication so that only the correct Notifications are accessed. This uses basic authentication as RSS readers only support basis authentication.
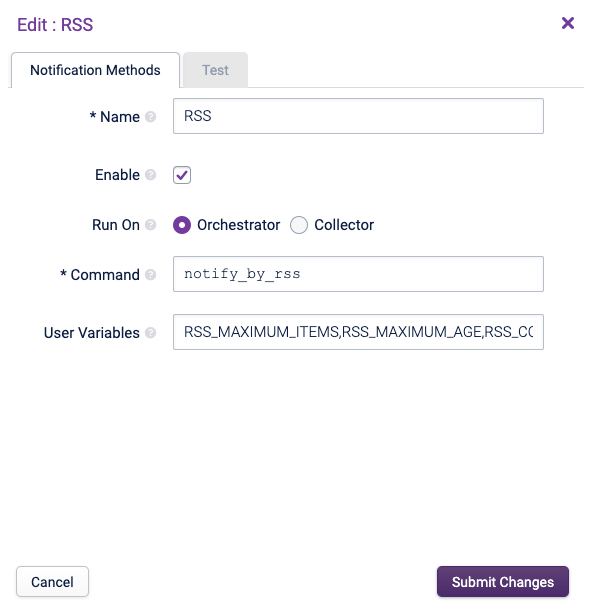
This method runs only on the Orchestrator server.
Notifications are written to an RSS file for each contact. The RSS feed is at http://opsview.example.com/abc. Where opsview.example.com is your Opsview web server address.
Access to the RSS feed requires authentication so that only the correct notification file is accessed. This uses basic authentication as most RSS readers only support basic authentication.
Push Notifications For iOS Mobile Copied
Warning
For the Opsview Mobile App login, you must use the https://legacy.opsview.com site to manage your account as there is currently a known issue affecting user registrations via the Mobile App.
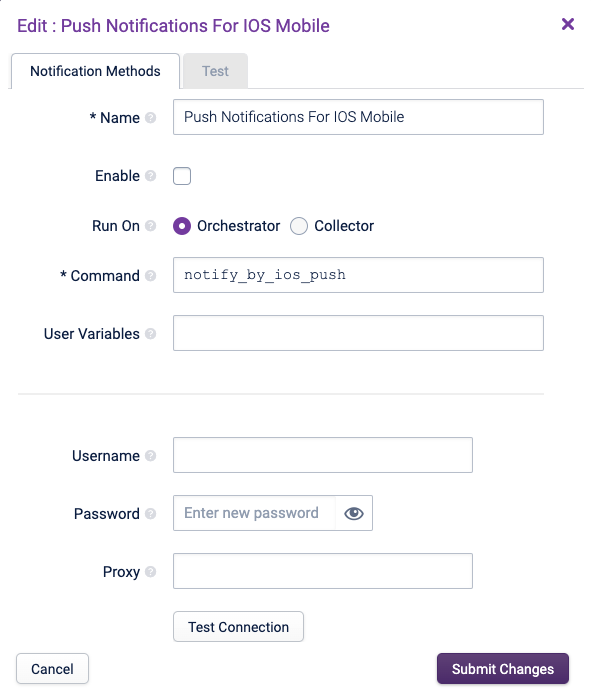
This sends push notifications to the Apple Opsview Mobile App to the specified user.
To enable push notifications, do the following steps:
- Set a valid https://legacy.opsview.com username and password in the app to enable registration with Opsview Cloud’s push servers. Additionally, provide a valid https://legacy.opsview.com username and password in the Opsview Cloud Push Notifications for iOS Mobile settings fields to allow the Opsview Cloud server to send outgoing push notifications.
Note
The two https://legacy.opsview.com accounts do not need to be the same; you can use a generic account for your Opsview Cloud notification method.
- Enter your Opsview Cloud Orchestrator server address and user credentials. Your iOS device will initiate a one-time connection to retrieve its UUID for device registration on
push.opsview.com. - Ensure that your iOS device can connect to
push.opsview.comvia HTTPS.
To configure the Push Notifications for iOS Mobile Notification Method, do the following steps:
- Select the Enable checkbox. Submitting a change to this checkbox will require running Apply Changes from the Configuration menu.
- Enter your https://legacy.opsview.com username and password.
- After clicking Test Connection, you should see one of the two messages below:
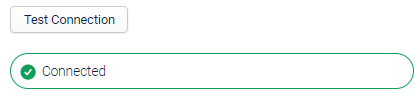
If the Opsview Cloud system does not have direct access to the internet, you can specify a Proxy in the text box labelled Proxy and re-test the connection. Once the connection succeeds, the configuration is completed.
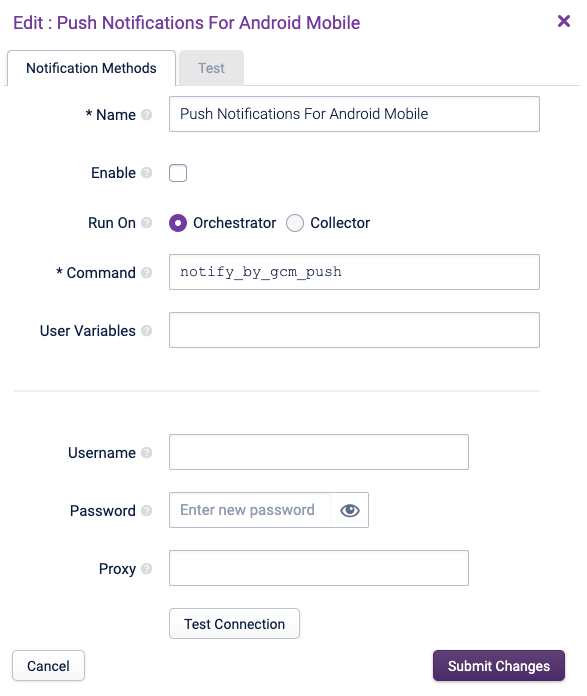
Push Notifications for Android Copied
Warning
For the Opsview Mobile App login, you must use the https://legacy.opsview.com site to manage your account as there is currently a known issue affecting user registrations via the Mobile App.
This sends push Notifications to the Android Opsview Mobile App to the username or password specified.
To enable push notifications, do the following steps:
- Set a valid https://legacy.opsview.com username and password in the app to enable registration with Opsview Cloud’s push servers. Additionally, provide a valid https://legacy.opsview.com username and password in the Opsview Cloud Push Notifications for Android Mobile settings fields to allow the Opsview Cloud server to send outgoing push notifications.
Note
The two https://legacy.opsview.com accounts do not need to be the same; you can use a generic account for your Opsview Cloud notification method.
- Enter your Opsview Cloud Orchestrator server address and user credentials. Your iOS device will initiate a one-time connection to retrieve its UUID for device registration on
push.opsview.com. - Your Android device must be able to connect to
push.opsview.comvia HTTPS.
To configure the Push Notifications for Android Mobile Notification Method, do the following steps:
- Select the Enable checkbox. Submitting a change to this checkbox will require running Apply Changes from the Configuration menu.
- Enter your https://legacy.opsview.com username and password.
- After clicking Test Connection, you should see one of the two messages below:
If the Opsview Cloud system does not have direct access to the internet, you can specify a Proxy in the text box labelled Proxy and re-test the connection. Once the connection succeeds, the configuration is completed.
AQL Copied
This provide a simple way of transmitting SMS alerts from Opsview through this web-based SMS gateway. This service works from most countries; all you need is an AQL account.
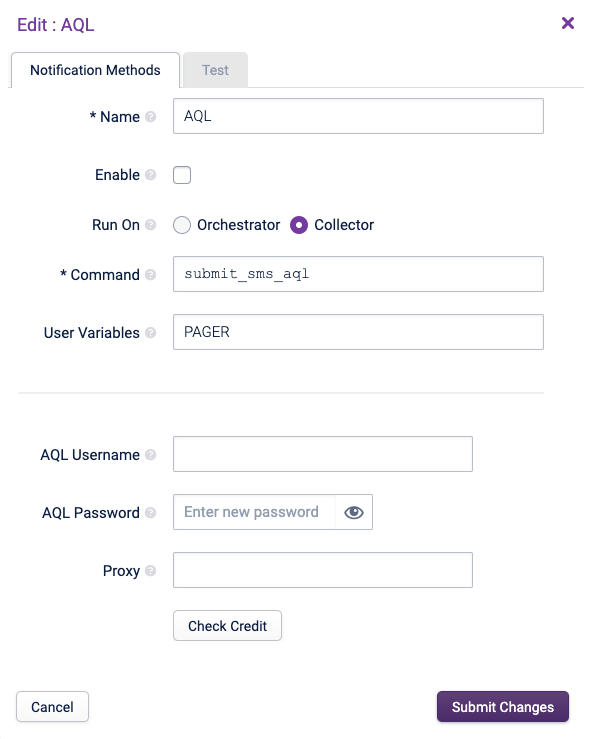
It requires a valid AQL Username/password with account credit. Opsview Cloud tells the AQL Gateway the message and the mobile phone / cell number via HTTPS, and AQL will then send an SMS/Text message to the number provided. Sign up for prepaid credits at aql.com with the code ‘opsera-1234’ to receive discounted rates and 50 free credits.
- AQL Username: This is the Username for the AQL system. Click on Check Credit to see how many credits you still have from AQL.
- AQL Password: This is your AQL password.
AQL’s solution requires that the Opsview server has connectivity to AQL over HTTP/80. AQL’s messaging servers are:
- gw1.sms2email.com
- gw11.sms2email.com
- gw2.sms2email.com
- gw22.sms2email.com
These servers are used in a round-robin fashion, so your firewall must allow connection to each one.
If you use a web proxy server, enter the proxy information within the ‘Proxy:’ field, in the format: http://User:password@Host:port/.
SMS Notification Module Copied
This sends an SMS via the physical modem attached to the Opsview Orchestrator/Collector server which must be connected to a POTS network.
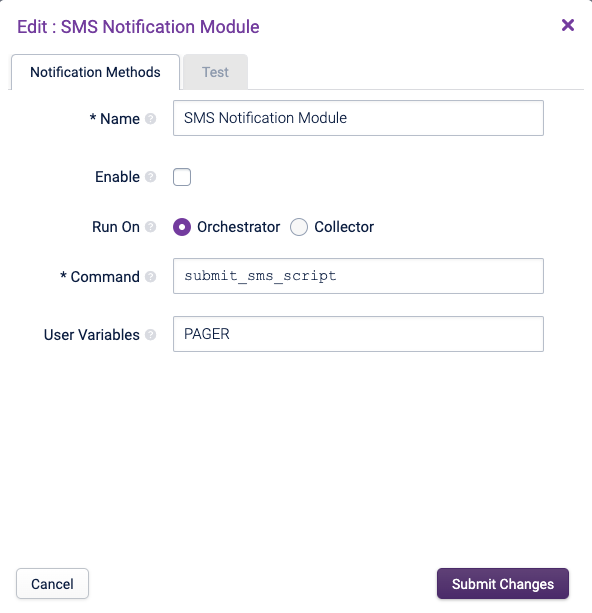
This Notification Method is used for sending SMS messages via directly attached GSM modems.
For information installing and configuring the SMS module.
Warning
SMS module is not available by default on Opsview Cloud. If you need it, please contact the Customer Success Team.
VictorOps Copied
This sends Notifications to VictorOps, a SaaS notification routing platform.
Within VictorOps, you can create rules to dispatch alerts via various methods such as SMS, Email, etc to individuals or groups of Users. Users need to setup an account on VictorOps and follow the steps below to activate it on the Opsview system.
-
First, in Opsview Cloud, activate the method by setting it to ‘Enable’, click ‘Submit Changes’ and go to Configuration > Apply Changes to make this change available to the Users screen.
-
Then go to http://www.victorops.com and sign up, if you do not already have an account.
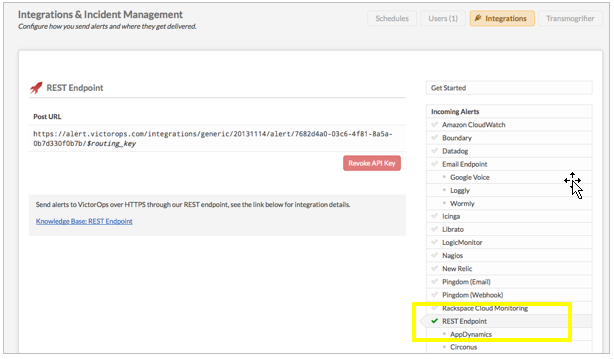
-
Once logged in, navigate to ‘Integrations’ and create a new REST Endpoint.
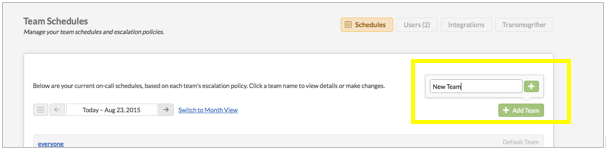
-
Next, navigate to ‘Settings > Schedules’ and add a new Team, in order to get a Routing key for your Users:
-
Once the team is added scroll down until you see the team name and its schedule and click on ‘Setup Routing’:
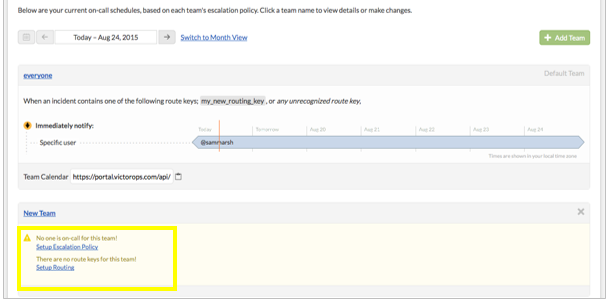
-
Once you have clicked on ‘Setup Routing’, scroll down to the bottom of the page where you can view and add routing keys:
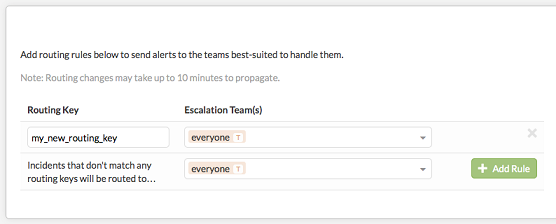
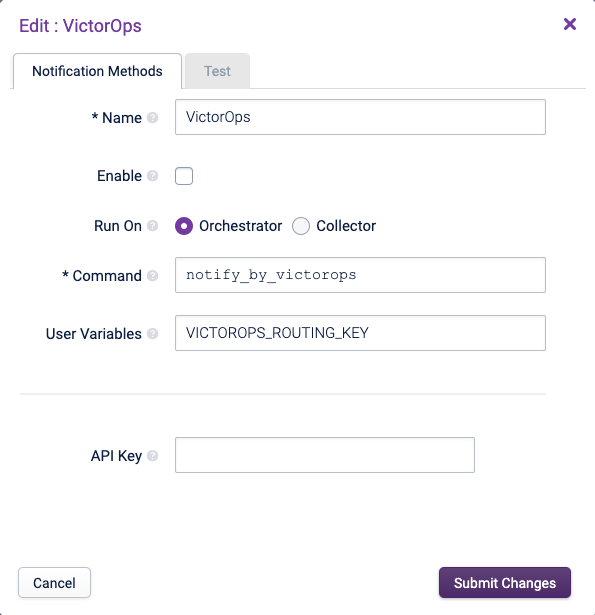
Now that you have the API key (as seen above) and the routing key (as seen above), you can now configure Opsview Cloud.
-
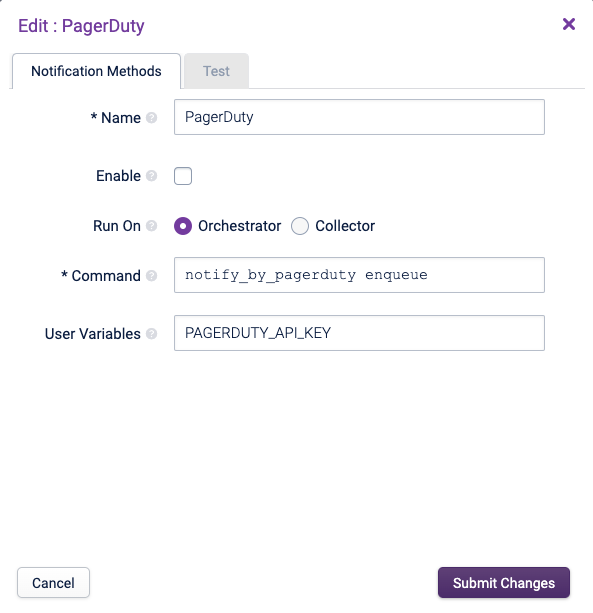
First, add the API Key (more specifically the part after ‘/alert/’) to the Notification Method, as shown below:
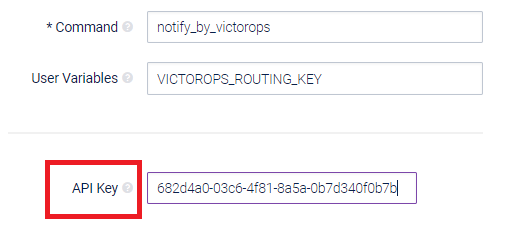
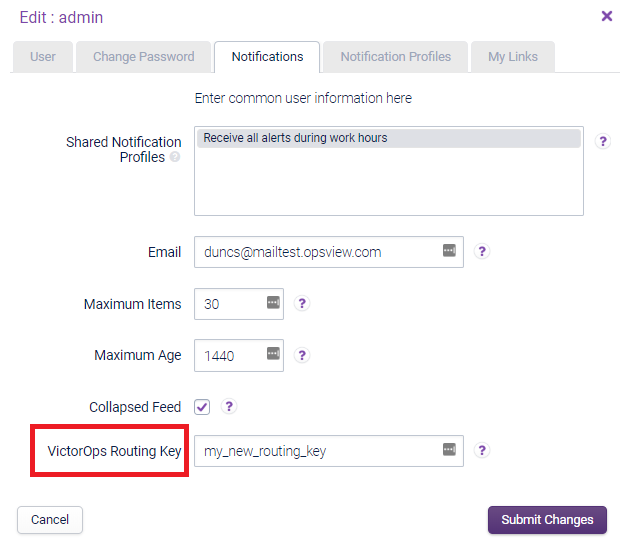
-
Next, go to the User profile via Configuration > Users and Roles to add the ‘VictorOps Routing Key’
Note
If you do not see this field, it is likely you have not checked the ‘Enable" field in the VictorOps Notification Method.
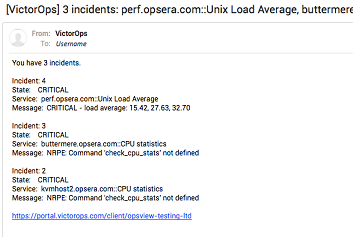
Once the Notification Profile is configured, Notifications should start arriving in VictorOps:
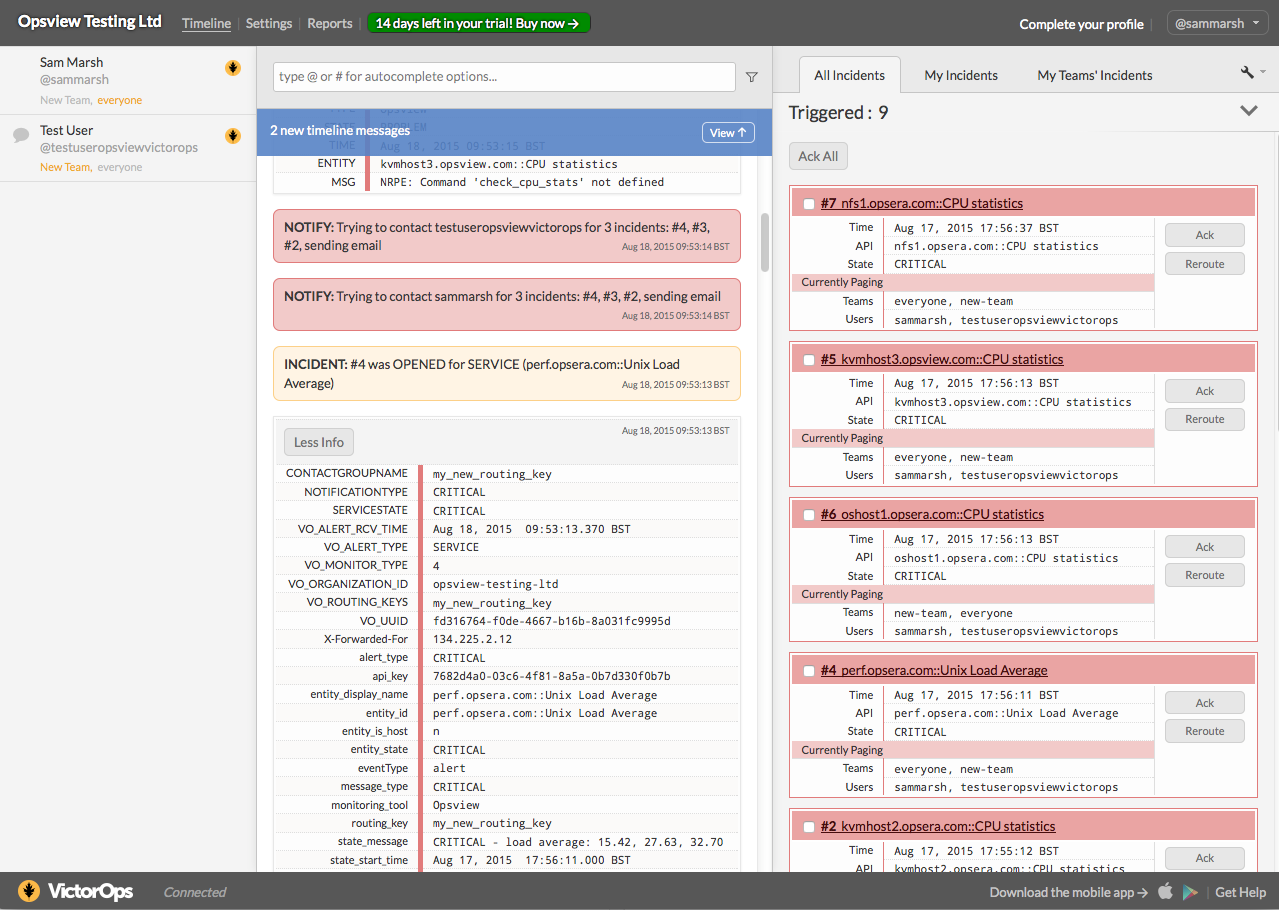
If you have configured your team schedules correctly, you should start receiving emails in your inbox:
Note
This Guide was written August 2015. The VictorOps.com User interface may have changed since; therefore, please let us know if any screens are out of date.
PagerDuty Copied
This sends Notifications to PagerDuty, a SaaS notification routing platform.
Within PagerDuty, you can create rules to dispatch alerts via various methods such as SMS, Email, etc to individuals or groups of Users. Users need to setup an account on PagerDuty and follow the steps below to activate it on the Opsview system.
-
First, in Opsview Cloud, activate the method by setting it to ‘Enable’, click ‘Submit Changes’ and go to Configuration > Apply Changes to make this change available to the Users screen.
Note
For BSM notifications, if PagerDuty is used, the command must be modified by addingnotify_via_nagiosbefore the name of the notification script. For example, the notification method’s command will becomenotify_via_nagios notify_by_pagerduty.
Note
Thenotify_via_nagiosscript is deprecated, and it will be removed in a future release. The same functionality is included inopsview-executor, and it can still be used in the same way.
-
Then go to http://www.pagerduty.com and sign up, if you do not already have an account.
-
Either as part of the sign up, or once already logged in, add a new ‘Opsview’ service:
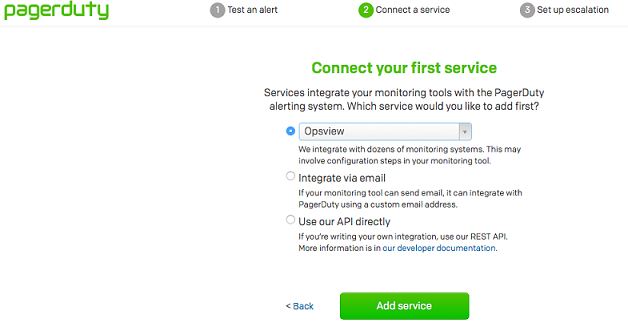
-
Sign up ’ ‘Connect your first service: Opsview’
-
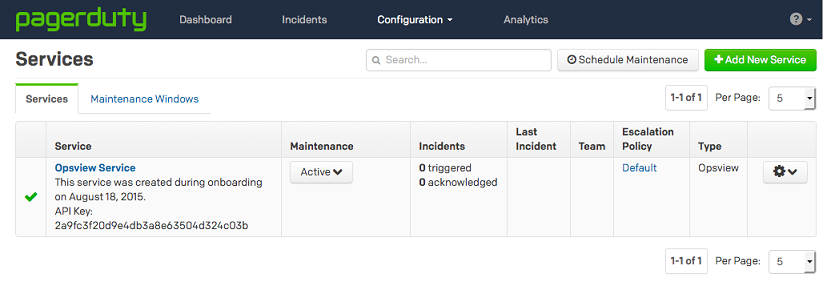
Logged in ’ ‘Configuration > Services’.
-
Once the service is added, the ‘API Key’ will be visible as per the above and below screens:
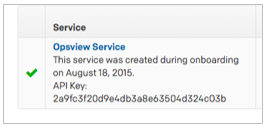
You can now configure Opsview Cloud:
-
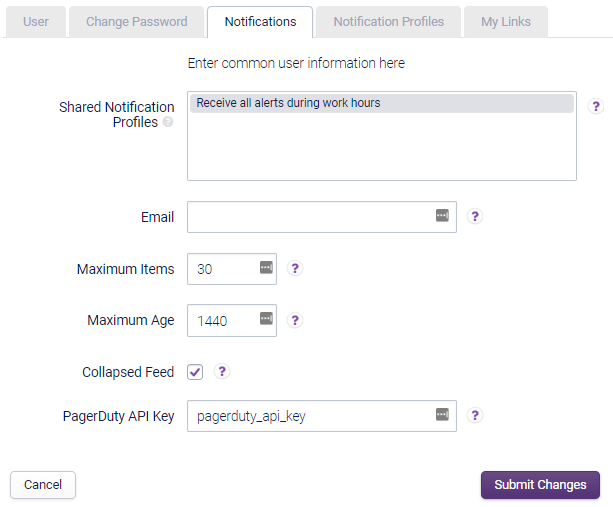
Add the API key on a user per user basis in the User profile via Configuration > Users and Roles, ‘Notifications’ tab:
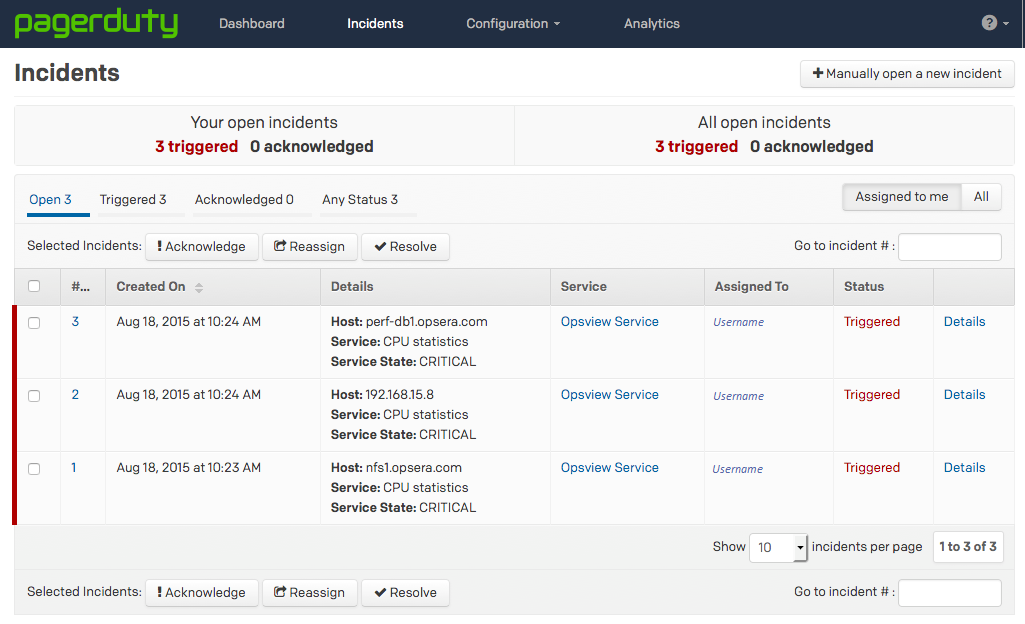
Notifications should start arriving in PagerDuty:
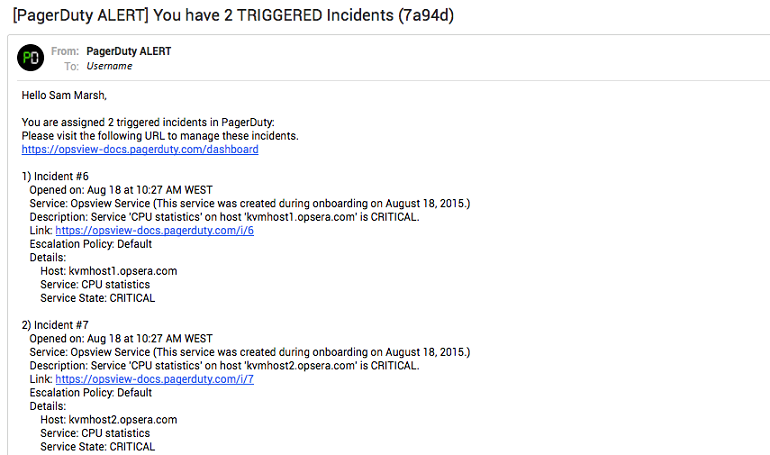
You should start receiving emails in your inbox:
Note
This Guide was written August 2015. The PagerDuty.com User interface may have changed since, therefore please let us know if any screens are out of date.
Twilio Copied
This sends a Notification to Twilio, a SaaS notification routing platform.
Within Twilio, you can create rules to dispatch specific types of notifications, including voice calls. Users need to setup an account on Twilio and follow the steps below to enable it on the Opsview system.
-
First, in Opsview Cloud, activate the method by setting it to ‘Enable’, click ‘Submit Changes’ and go to Configuration > Apply Changes to make this change available to the Users screen.
-
Then go to http://www.twilio.com and sign up, if you do not already have an account.
-
As part of the sign up, you will need to ‘Get your Twilio number’. This is the phone number that voice calls and SMS are sent FROM, i.e. the caller.
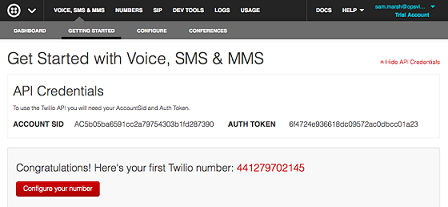
You can see the three required information: the Account SID, The Auth token and the Twilio number.
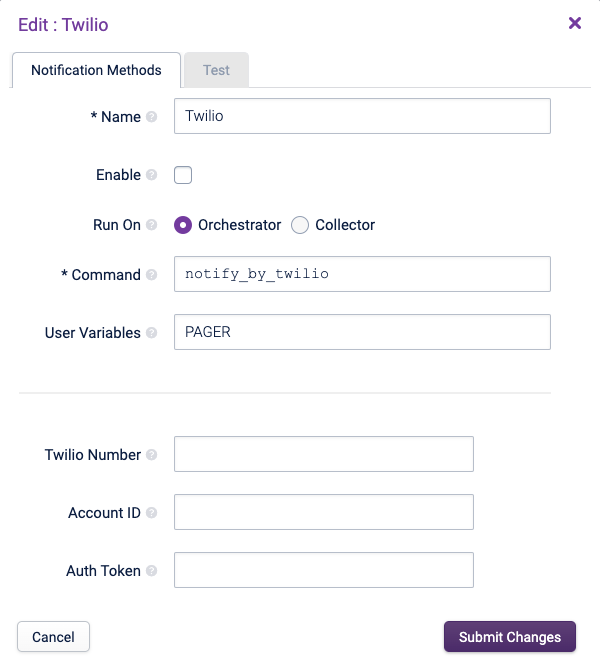
- Now that you have the three parts of information; the Account SID, the Auth Token and the Twilio Number, you can configure the Notification Method:
- Add the telephone number on a user per user basis in the User profile via Configuration > Users and Roles, Notifications tab, in the Mobile field.
Note
You must verify this telephone number from Twilio first.
In order to send notifications into Twilio, a Notification Profile that uses the ‘Twilio’ Notification Method must be configured. This is covered in Section Notification Profiles
Once the Notification Profile is configured, notifications should start arriving in Twilio, as shown below:
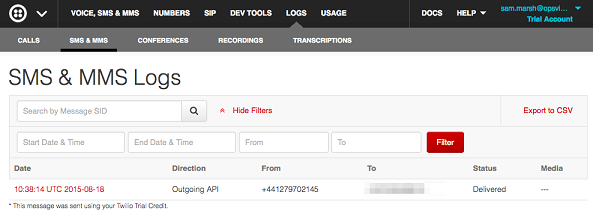
SMS and MMS logs
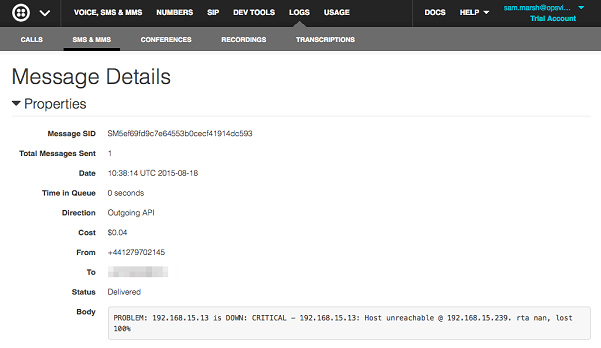
Individual log, showing SMS message to the given phone number
If you have configured your phone number, you should start receiving text messages.
Note
This Guide was written August 2015. The Twilio.com User interface may have changed since, therefore please let us know if any screens are out of date.
Slack Copied
This sends alerts into a Slack room, for example: #support.
Slack is a ‘chat room’, that allows teams of Users to collaborate over the internet. The value-add over a chatroom is that Slack allows ‘inbound integrations’ from various tools such as Opsview Cloud. This means that an ‘Operations team’ can have a chat room, where alerts from Opsview are sent - they can discuss and view Notifications in the same forum - as opposed to a standalone email. Users need to setup an account on Slack and follow the steps below to activate it on the Opsview system.
-
First, in Opsview Cloud, activate the method by setting it to ‘Enable’, click ‘Submit Changes’ and go to Configuration > Apply Changes to make this change available to the Users screen.
-
Go to http://www.slack.com and sign up, if you do not already have an account. it will take you through the basic setup process of creating teams and rooms.
-
Once the setup is finished, log in and follow Slacks documentation on how to creating a new Incoming Webhook. https://api.slack.com/messaging/webhooks
-
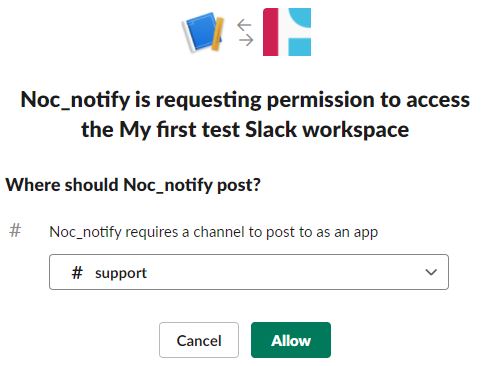
When creating your Webhook Slack will ask you to select the channel you wish to send Opsview Cloud Notifications into. In our example, we are going to send Notifications into the #support slack channel:
-
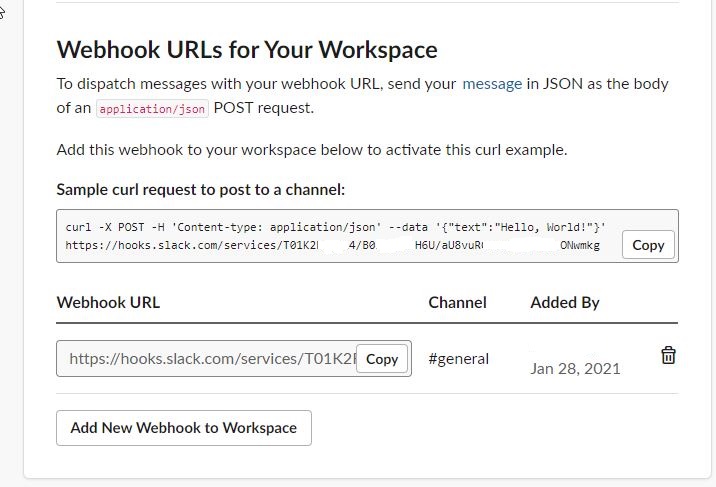
Once you have create a new Webhook you will be supplied with a Webhook URL, make a note of these details, each webhook is unique.
-
Now that we have our WebHook, we can configure the Slack Notification Method:
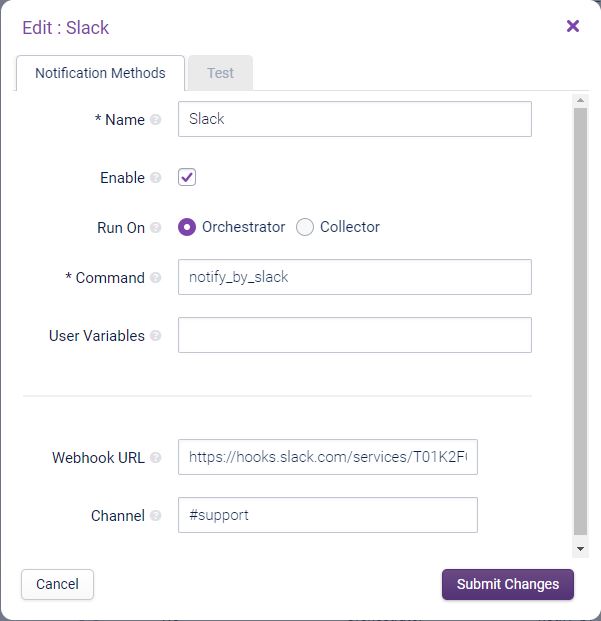
The ‘WebHook URL’ is visible in the screen above, and the ‘Channel’ was set during the creation of the WebHook; i.e. #support.
A Notification Profile that uses the ‘Slack’ Notification Method must be configured. This is covered in Notification Profiles.
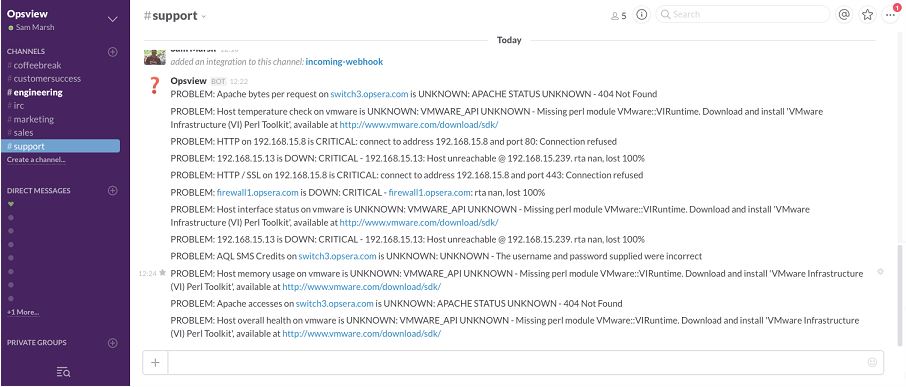
Once the Notification Profile is configured, Notifications should start arriving in the #support Slack room:
Multiple Slack methods Copied
The below details adding additional Slack Notification Methods. You will need to obtain the slack webhook associated with your desired channel as described in the above section. To recap you will need to create an app in Slack at https://app.slack.com/apps-manage/ with permissions to post into your required channels.
You will need to create a new VARIABLE too, which is covered after this section, but importantly, that new VARIABLE name will need to match what is set here or vice versa depending on the order you create them in.
Select “Add New” within Notification Methods and enter the below as the Command; this example uses SLACKNOC as the VARIABLE name.
notify_by_slack slacknoc -c %SLACKNOC% -u %SLACKNOC:1%
The options used in the command are as follows:
-
-c
-the channel that you want to send messages to, will override the Opsview notification variables if specified. In our example the channel the messages will be sent to is #slack-noc-alerts. -
-u
- The WebHook URL created via the Slack App (as above). In our example this would be https://hook.slack.com/services/T02HS76BA/BQUR.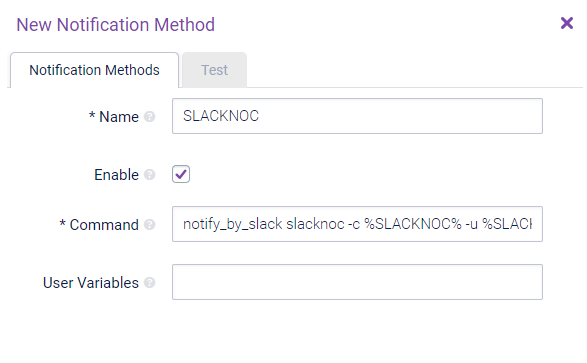
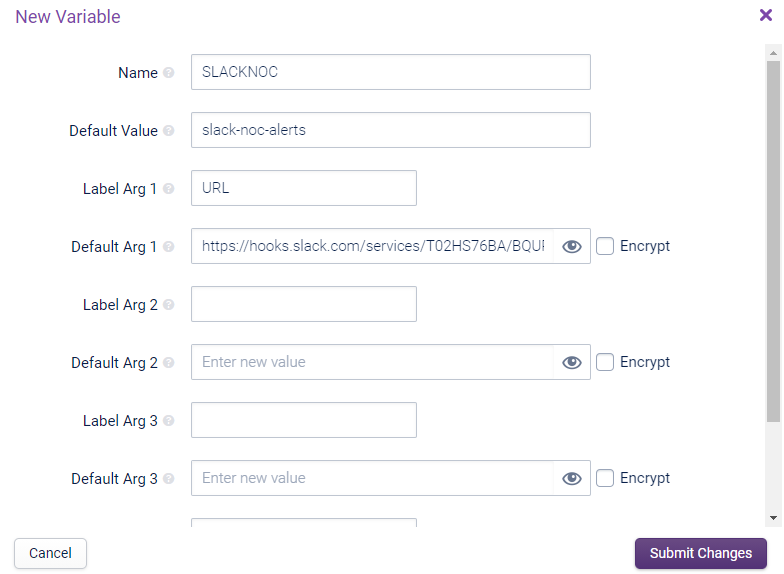
If not already done, create the VARIABLE via the Configuration > Variables page as follows:
After performing an Apply Changes, you should now start to get notifications into your Slack channel (you can also check this via the Test tab on the Notification Method)
Microsoft Teams Copied
This sends alerts into a Teams channel. This is useful so you can collaborate on alerts and discussions in the same location.
Prerequisites Copied
- You already use Teams.
- You already have a channel setup.
- You have created a webhook for the channel. See instructions at Create an Incoming Webhook - Teams . Note the Webhook URL
Note
You will need to ensure a network connection is open from your Opsview orchestrator server to the Webhook URL’s host on port 443.
Then in Opsview Cloud:
-
Go to Configuration > Notification Methods.
-
Edit the Microsoft Teams notification method.
-
Click the ‘Enable’ checkbox to activate the notification method.
-
Enter the Webhook URL.
-
On the Test tab, click Send. This will send a test message to the Webhook URL and should appear in your Teams channel:

-
Click Submit Changes to save changes to this Notification Method.
-
You then need to configure Notification Profiles to use this Notification Method. See Notification Profiles for more details.
-
Once the Notification Profile is configured and Apply Changes has been run, notifications sent by Opsview should start arriving in the channel.
ServiceNow Copied
The ServiceNow Notification Method allows notifications from Opsview to be opened as Incidents under an instance of ServiceNow - a SaaS IT Incident management system. Opsview Cloud comes with a predefined notification method for ServiceNow allowing for easy out of the box configuration. It is also possible to manually add more methods using the notification script to point at different ServiceNow instances if required. To configure either approach, follow these steps:
Basic Configuration Copied
- First, in Opsview Cloud, navigate to the Notification Method list. This can be found in
Notifications > Notification Methods. - Click the contextual menu icon next to
ServiceNowand selectEdit. - The command in the
Commandbox contains references to the variables surrounded by percentage mark (%) symbols. These variables allow you to configure the method with the Username, Password and Instance URL of the ServiceNow instance. The “out of the box” ServiceNow method uses the SERVICENOW_SETTINGS variable, but you can use any existing or newly created variable.
Example for ServiceNow Command box:
notify_via_nagios notify_by_servicenow -u "%SERVICENOW_SETTINGS:1%" -p "%SERVICENOW_SETTINGS:2%" -i "%SERVICENOW_SETTINGS:3%" -f "%SERVICENOW_SETTINGS:4%" -dp -k -r
Note
To create multiple notification methods pointed at different Instances, simply create a new Notification Method that duplicates the example above but with a newVARIABLEname instead ofSERVICENOW_SETTINGS.
-
Four flags exist that allow you to configure the behaviour of the ServiceNow scripts. To enable or disable these settings, simply append or remove the flags from the command.
Flag (short) Flag (long) Behavior -a--auto_closeWhether to close ServiceNow Incidents when the Incident is resolved. (Defaults to marking the Incident as Resolved) -dp--decreasing_priorityWithout this setting on, all values set by State (such as Impact and Short Description) will use the worst State the Notification has hit. With it on, all state changes are reflected in the all fields. -k--acknowledgeWhether to Acknowledge Notifications successfully sent inside Opsview. Acknowledging a Notification in Opsview will stop any further state changes for the Incident being raised as Notifications until the resolution. -
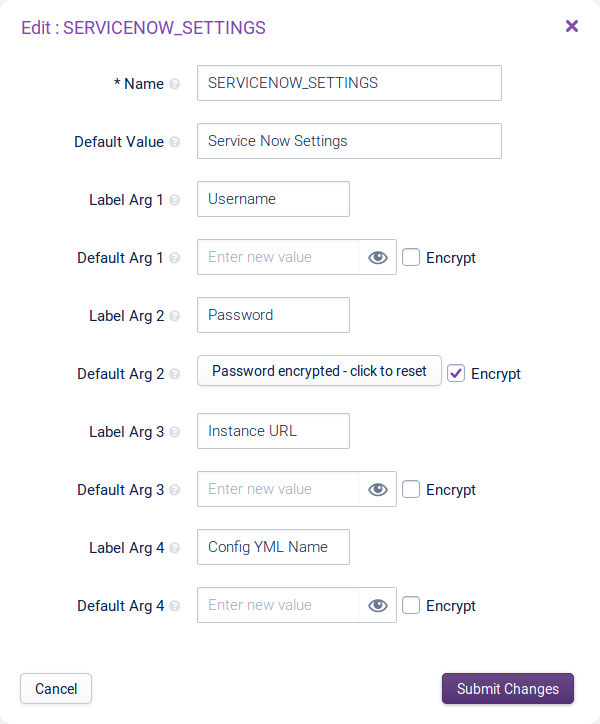
To create or edit a variable, go to
Configuration > Variables. EditingSERVICENOW_SETTINGSwill only affect the pre-defined ServiceNow notification method. To create a new variable please read Adding a Variable. The variable should follow this structure with Password optionally encrypted to increase security:# Argument Label Value Command Flag (used in Notification Method Command) 1 Username Username of the User through which Incidents are created. -uor--username2 Password Password of the User through which Incidents are created. -por--password3 Instance URL URL of the ServiceNow instance. -ior--instance-url4 Config YAML Name Filename of the custom configuration file in /opt/opsview/monitoringscripts/etc/notifications(Covered later in this documentation and entirely optional)-for--filename -
Username and Password should be populated with the credentials of the user through which Incidents will be raised. We recommend creating a new account for this purpose so automatically created Incidents can be tracked by user. The
rest_api_explorerandincident_managerroles and the roles they inherit are required for usage of this notification method. -
Instance URL should be filled in with the base URL of the ServiceNow instance with no additional path afterwards. For example,
https://demo.service-now.comnothttps://demo.service-now.com/incident_list.do. -
Config YML Name is used to pass in a custom mapping file to the notification method. Further information on this can be found later in this page. The filename passed in here should be just the name of the configuration file located in
/opt/opsview/monitoringscripts/etc/notifications, not the full path. For example,custom_servicenow.yamlinstead of/opt/opsview/monitoringscripts/etc/notifications/custom_servicenow.yaml.
Example for SERVICENOW_SETTINGS variable configuration:
- Submit changes then navigate to the User profile via Configuration > Users and Roles to add the notification method to the preferred Notification Profiles.
- Reload and the ServiceNow notification method will now be set up.
Advanced custom mapping Copied
In addition to the configuration found in SERVICENOW_SETTINGS, the contents of the requests created by this notification method can be further customized by creating a custom mapping file. The file servicenow.yaml.default is located in /opt/opsview/monitoringscripts/etc/notifications/ and is an example of such a mapping file used by the script to generate requests if no custom file is passed in.
The default configuration file contains the setup for two mappings and four notification states. Any values set in a custom configuration file are loaded in over the defaults. Likewise, any values missing from a custom configuration fall back to the defaults. All of this means that to make a small change (for example, the short_description for Host notifications) would only need a custom file made with the lines below in.
servicenow:
  common_field_map: # Field Map
    host: # Incident Type
      comments: "{HOSTNAME}\n{COMMENTS}" # Values
      short_description: "{HOSTNAME}/{HOSTGROUPNAME} is {HOSTSTATE}"
    service_check:
      comments: "{COMMENTS}"
      short_description: "{SERVICEDESC} on Host {HOSTNAME}/{HOSTGROUPNAME} is {SERVICESTATE}"
Contact Opsview Customer Support for assistance in getting your custom mapping files imported to your environment.
Incident types Copied
A configuration YAML can define the contents of an Incident raised depending on the state of the Notification. The following field_map’s relate to states of Notifications and each can therefore be configured individually.
common_field_map
common_field_map is the base mapping section, being the fallback for the other 3 settings. In a similar way to how a custom yaml overwrites the default yaml, initial, update and recovery field_mappings overwrite values found in the common field map and the common fills the gaps in the others. Any values set here will be used for every type of notification unless explicitly set otherwise.
initial_field_map
initial_field_map contains the mappings for when an Incident is initially raised.
update_field_map
update_field_map contains the mappings for when an Incident is being updated.
recovery_field_map
recovery_field_map contains the mappings for when an Incident is being resolved.
Values Copied
The following fields are only the ones by the default mapping. With a custom configuration file, any values can be sent to ServiceNow, including custom fields defined in the Incident table as every field equates to one key in the request sent to ServiceNow to create the Incident.
comments
The comment to add when the Incident is updated on ServiceNow.
short_description
The short description of an Incident is used by ServiceNow as a title for the Incident.
incident_state
The state of the Incident in ServiceNow.
impact
The impact of the Incident in ServiceNow.
The following keys can be used in the configuration YAML to define custom fields and overwrite default ones.
| Key | Value |
|---|---|
| {HOSTGROUPNAME} | Name of the Host Group the Notification originates from. |
| {HOSTADDRESS} | Address of the Host the Notification originates from. |
| {HOSTSTATE} | State of the Host the Notification originates from. |
| {HOSTSTATETYPE} | State type (Hard or Soft) of the Host’s state. |
| {HOSTOUTPUT} | Output of the last Host check. |
| {LASTHOSTUP} | Timestamp the Host was last up. |
| {SERVICENOTES} | Description of the Service Check the Notification originates from. |
| {SERVICEDESC} | Name of the Service Check the Notification originates from. |
| {SERVICESTATE} | State of the Service Check the Notification originates from (OK/WARNING/CRITICAL/UNKNOWN). |
| {SERVICEOUTPUT} | Output of the Service Check the Notification originates from. |
| {SERVICESTATETYPE} | State type (Hard or Soft) of the Service Check’s state. |
| {LASTSERVICEOK} | Timestamp the Service Check was last OK. |
| {IMPACT} | Impact of the Incident based on the notification state and the impact_map in the YAML. |
| {PRIORITY} | Priority of the Incident based on the notification state and the priority_map in the YAML. |
| {COMMENTS} | Comment string generated by the script for the notification. |
| {LASTCHECK} | Timestamp of the last Service/Host check. |
| {LASTSTATE} | Last recorded state of the Incident. |
Using the above information, if you (for example) wished to set a correlation_id for each Notification based on some of the Keys above, you could add it to common_field_map like so.
servicenow:
  common_field_map:
    host:
      correlation_id: "{HOSTNAME};;{LASTHOSTUP}"
    service_check:
      correlation_id: ""{HOSTNAME};{SERVICEDESC};{LASTSERVICEOK}"
Now that the ServiceNow notification method(s) have been set up, notifications created from the Hosts and Service Checks assigned to Notification Profiles with the method selected will have corresponding Incidents created in ServiceNow. The first appearance of an issue will cause an Incident to be created with further state changes updating the Incident until the state returns to OK or UP where it will be marked as Resolved or Closed based on the value passed. Additional changes to the Incident will be logged as comments on the Incident’s page.
To learn more about what you can do with Incidents in ServiceNow after they’ve been created, look at ServiceNow - Incident Management.
Custom Methods Copied
Please see Custom Notification Methods for creating your own method.