Running an Autodiscovery scan
Managing and running manual scans Copied
For the On-demand Scans, the Scan Management grid allows you to perform a set of actions that relate to running scans.

Scan title Copied
This column displays each scan you have created, by their name.
Control Copied
From this column, you can apply an action on the scan by clicking the icon. Note that only certain actions can be performed based on the scan’s current status (e.g. you cannot ‘show log’ before a scan is started).
-
Start — allows you to start the scan.

-
Stop — allows you to stop the scan.

-
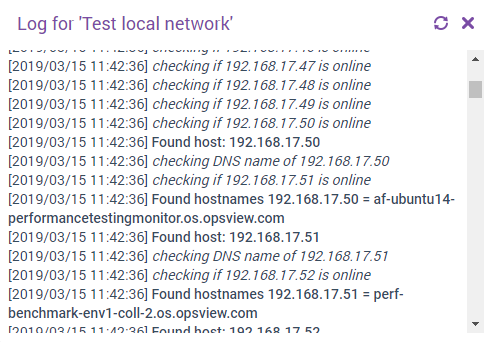
Show Log — allows you to open the log of the scan with information the run.

If the scan is running against a large number of Hosts or detecting agents/SNMP/etc for each Host, it is prudent to ‘Show Log’ to see what is actually happening. This will have textual information about the current progress of the scan. The contents will automatically update as more data is processed by the scan.
-
View Results — when a scan finishes, it will transition to the
Completedstate. Clicking the View Results icon opens a new tab, known as the sandbox view, where you can access the scan results. For more information, see Importing scan results.
-
Edit — allows you to change the configuration of an existing scan.
Status Copied
A Scan will transition between one of 4 states within Scan Management. These states are:
- Configured — the scan has been created and configured. This is the default status once you have created your scan.
- Pending — you have clicked the start button, the scan is queued and ready to be run.
- Running — the scan is running. Only one scan can be running at a time.
- Completed — the scan has finished. You can now enter the sandbox view to analyze the results of the scan.
Actions Copied
You can take the following actions using the contextual menu of a given scan:
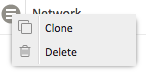
- Clone — it is not possible to rerun a scan, so you will need to clone an existing one if you want to perform the same task.
- Delete — deletes the scan and any of its related data such as the results. Note that if you have imported hosts for monitoring, they will not be deleted from Opsview Cloud.
Type Copied
This column will indicate whether your scan is a Windows, VMware or Windows scan.
Created at Copied
This column indicates the date and time of the creation of the scans.
Started at Copied
This column indicates the date and time of the start of the scan runs.
Estimated Copied
Is an evaluation of how long the Autodiscovery scan will run, based on the number of IPs in the configured range and the number of detections that need to be run.
Completed at Copied
This column indicates the date and time of the completion of the scan runs.
Managing and running scheduled scans Copied
You can see the list of scheduled scans by clicking on the On-demand Scans drop-down and selecting Scheduled Scans.
You can edit, delete, clone those scans. If needed you can also disable a scheduled scan if you do not wish for it to run on the next scheduled date/time, otherwise you do not need to trigger any action manually as the run will happen automatically on the date/time that you have configured.

There is an icon to denote that the scheduled scan is currently enabled:

You can disable it via the contextual menu:
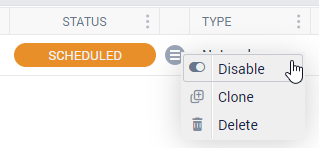
Disabling it is useful so that you can temporarily disable a scheduled scan, rather than deleting it permanently.
When a Scheduled Scan reaches the Scheduled time, a new On-demand Scan will be created using this Scheduled Scan as a template. If you click on the View Scans icon, then you will be taken to the On-demand Scans grid, filtered by all the On-demand Scans created by this Scheduled Scan. This allows you to see the history of the scans for this Scheduled Scan:

If there are no On-demand Scans created, the View Scans icon will be disabled:

Troubleshooting Copied
- If you run a scan but it fails with the message
Cannot start scan because monitoring server is deactivated, ensure that the cluster performing the scan currently monitors at least one host (collectors in the cluster do not count). This is a known issue.