Service Groups
Overview Copied
Within Opsview Cloud, each Service Check must be assigned to a Service Group; a logical container of one or more Service Checks that is used for Notifications, access control and more. Each Service Check must be a member of a Service Group, and can only belong to a single Service Group.
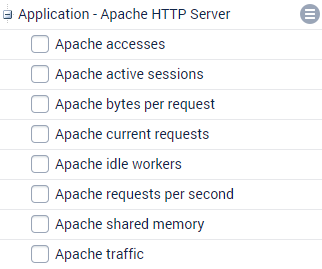
Within a default Opsview Cloud system, there are numerous Service Groups containing one or more Service Checks. For example, the Application - Apache HTTP Server contains eight Service Checks:
Service Groups like Application - Apache HTTP Server are used in Opsview Cloud for Notifications and also access control.
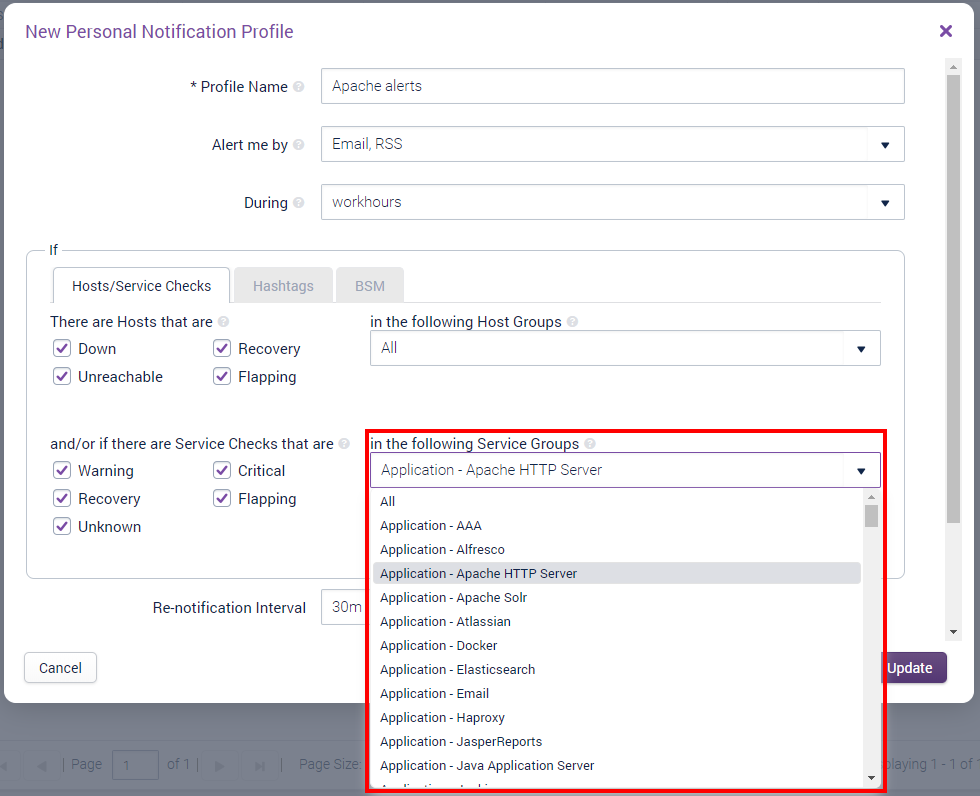
In Notification Profiles, Service Groups are used in combination with ‘host groups’ in the ‘Hosts/Services’ tab to determine what Service Checks status changes the Users are notified for.
For example, if there are 20 hosts within the ‘Cloud’ host group, and only 1 host has a Service Check applied to it that is a member of the Application - Apache HTTP Server, then this 1 host’s 1 Service Check is the only item that will be notified upon.
Similarly, if you wanted to be notified only for errors on Application - Apache HTTP Server service checks, regardless of the host, you would select ‘-’ in the ‘in the following host groups:’ dropdown box, and select Application - Apache HTTP Server in the Service Groups box. This means that if any Apache Service Check went into a non ‘OK’ state, then you would be notified.
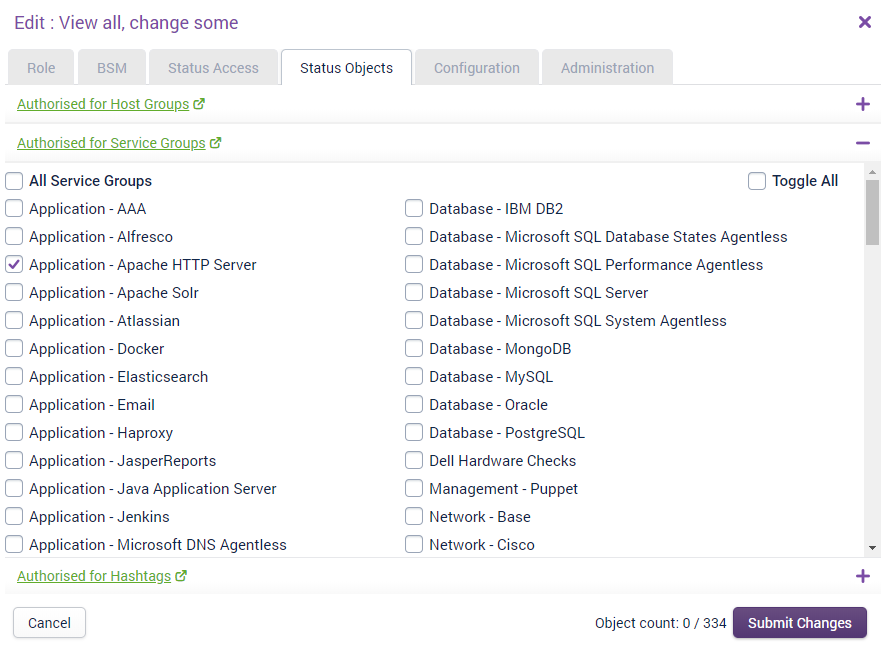
Service groups can also be used for access control limiting Users who are members of a role by determining what Service Groups & host groups combination they can see. For example, you may want to only allow Users of a certain role to be able to view only Apache Service Checks on only Apache hosts when they log-in.
To do this, you can choose the host group containing the Apache hosts within the Authorised for Host Groups section, and select ‘Application ’ Apache HTTP’ within the Authorised for Service Groups section.
This tells Opsview Cloud, only show Users who are members of this role Apache Service Checks on Apache servers when they log in.
Adding a New Service Group Copied
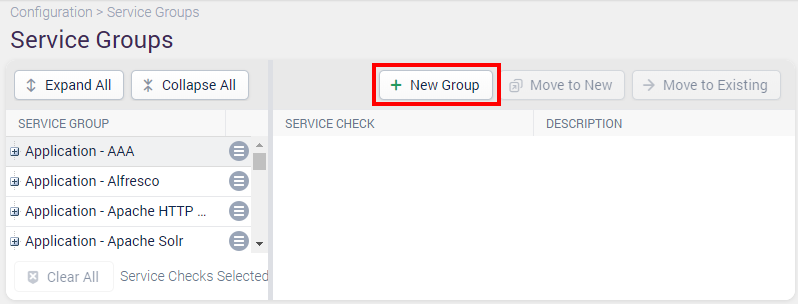
The addition, deletion and modification of service groups is all done via the Configuration > Service Groups menu.
Once within the Service Groups window, you can click on the New Group button in the top right:
This will load a new modal window which will require you to add the name of the new Service Group:
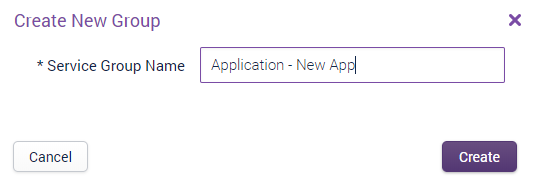
Clicking Create will add the new Service Group to the list on the left of the Service Groups window.
Moving Service Checks Into a Service Group Copied
To add Service Checks into a Service Group, either an existing one or a new one, you should first decide which Service Checks you wish to move.
To do this, expand the Service Groups on the left hand panel and select the Service Checks you wish to move by checking the checkbox next to the Service Checks. Service Checks from multiple Service Groups can be selected and moved in one action:
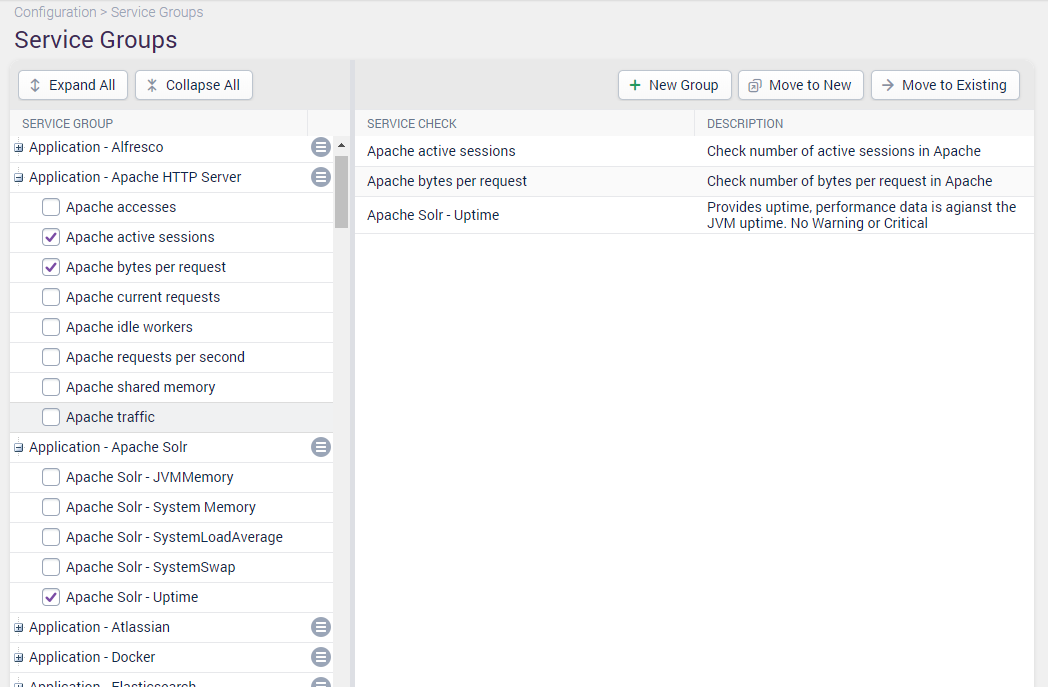
In the screen above, we have selected two Service Checks from the ‘Application ’ Apache HTTP Server’ Service Group and one from the ‘Application ’ Apache Solr’ service group. These checks are visible in the right hand table, also, along with their description. Next, you should click on either:
- Move to New: Create a new Service Group that you wish to move these new Service Checks into.
- Move to Existing: Move Service Checks into a pre-existing Service Group.
As creating a new Service Group is covered in Adding a New Service Group, we will move the Service Checks to an existing Service Group. To do this, click on ‘Move to Existing’ which will load a modal window up as shown below:
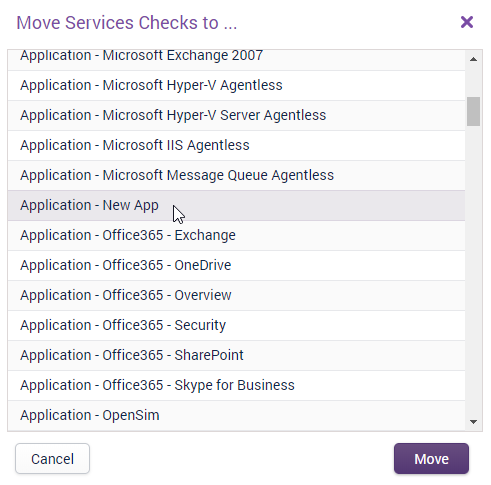
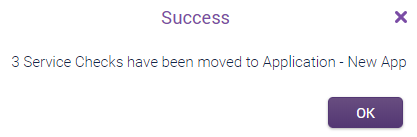
In the example above, we are going to move the three selected Service Checks into the ‘Application ’ New App’ Service Group. Simply click ‘Move’ and the Service Checks will be moved, along with a confirmation box as below:
Renaming a Service Group Copied
To rename a Service Group, simply click on the contextual menu for the Service Group and click on ‘Rename’. This contextual menu is visible next to the Service Group in the left hand panel, as per the screen below:
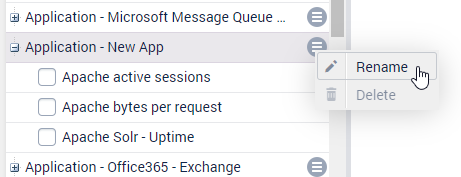
In the example above, we are going to rename ‘Application ’ New App’ to ‘Application ’ New App 2’. After clicking ‘Rename’, a modal window will load asking for the new name of the Service Group:
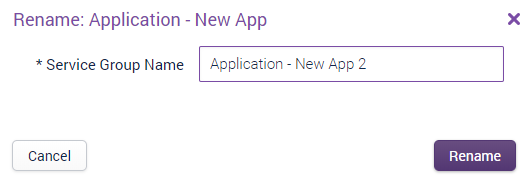
Click on ‘Rename’ and the Service Group’s name will be successfully changed.
Note
Once the rename has taken place, there is no action that you to need to do in terms of access control or notifications; i.e. you do not need to go and edit all places that rely on the Service Group ’ Opsview Cloud will update all of these places for you.
Deleting a Service Group Copied
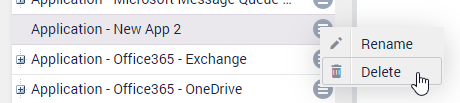
To remove a Service Group, simply click on the contextual menu for the Service Group and click on ‘Remove’. This contextual menu is visible next to the Service Group in the left hand panel, as per the screen below:

In the example above, we are going to remove ‘Application ’ New App 2’ but as we can see the ‘Delete’ button is greyed out, and the message ‘Cannot delete this Service Group as it has Service Checks’ is displayed.
In order to remove a Service Group, you must first ensure it is empty of all Service Checks. To do this, follow the guides in Moving Service Checks into a Service Group.
Once the service group is empty, simply click on the contextual menu and click on Remove:
Once clicked, a confirmation box will appear as below:
Finally, click on OK to confirmation the removal and the Service Group is removed from Opsview Cloud.