WMI Agentless monitoring services
Overview
To use Opsview Monitor’s agentless Windows checks, you need a user account set up on the remote Windows server that has access to Windows Management Instrumentation (WMI) data counters. To set this up, follow these steps:
- Create a standard Administrator account.
- Configure a restricted user that is only allowed access to standard user functions and WMI performance counters.
Using an Administrator account for monitoring purposes can be a security risk, so the following instructions on how to create a more appropriate privileged user on the remote Windows server are provided below.
Configuration
This guide will complete three essential steps to set up the account:
- Grant the account access to Distributed Component Object Model (DCOM), which is used to run WMI queries.
- Give the account access to the WMI tree, with at least the
root/CIMv2branch permission. - Add the user to the Performance Monitor Users group to enable performance monitoring.
It is recommended to create a user and adding them to the following Windows groups:
- Distributed COM Users — this group has default rights to access DCOM remotely.
- Performance Monitor Users — this group has default read-only rights to WMI performance counters.
Create a read-only monitoring account
- Create a normal user with standard privileges.
- Add the user to the following groups: Distributed COM Users and Performance Monitor Users.
- Open the Windows Management Instrumentation control panel, and click Start > Run > wmimgmt.msc.
- Right-click WMI Control (local) and select Properties.
- Navigate to the Security tab.
- Select the root namespace and click Security.
- Add the group Performance Monitor Users to this account.
- Select the following permissions for Performance Monitor Users:
- Execute Methods: Allow
- Enable Account: Allow
- Remote Enable: Allow
- Read Security: Allow
- Once completed, select Performance Monitor Users in the list.
- Click Advanced in the Security for Root dialog box.
- Under Permissions, click Performance Monitor Users.
- Select Edit and ensure This namespace and subnamespaces is selected under the apply to object.
Windows Firewall
If the Windows Firewall is enabled on the monitored host, you must change some settings to allow WMI requests.
- Ensure that the Windows Firewall is started and operating correctly.
- Navigate to Control Panel and open the Windows Firewall window.
- On the left hand side, select Allow a program or feature through Windows Firewall.
- Scroll down to the entry and select Windows Management Instrumentation (WMI).
- Enable Private (Home/Work) and Public access, if required.
Configure DCOM Permissions
- Open the Component Services window and click Start > Run > dcomcnfg.exe.
- Expand Component Services > Computers > My Computer.
- Right-click My Computer and select Properties.
- Go to the COM Security tab.
- Under Launch and Access Permissions, select Edit Limits.
- Ensure that the group Distributed COM Users has the following permissions applied:
- Local Launch
- Remote Launch
- Local Activation
- Remote Activation
- Save the changes.
You can now use this account to monitor your Windows server from Opsview Monitor.
Opsview Monitor configuration
Opsview Monitor makes it easy to add and start monitoring Windows servers using WMI, Microsoft’s tool for agentless monitoring.
-
Log in to the Opsview Monitor.
-
Navigate to Configuration > Hosts, and then click Add New.
-
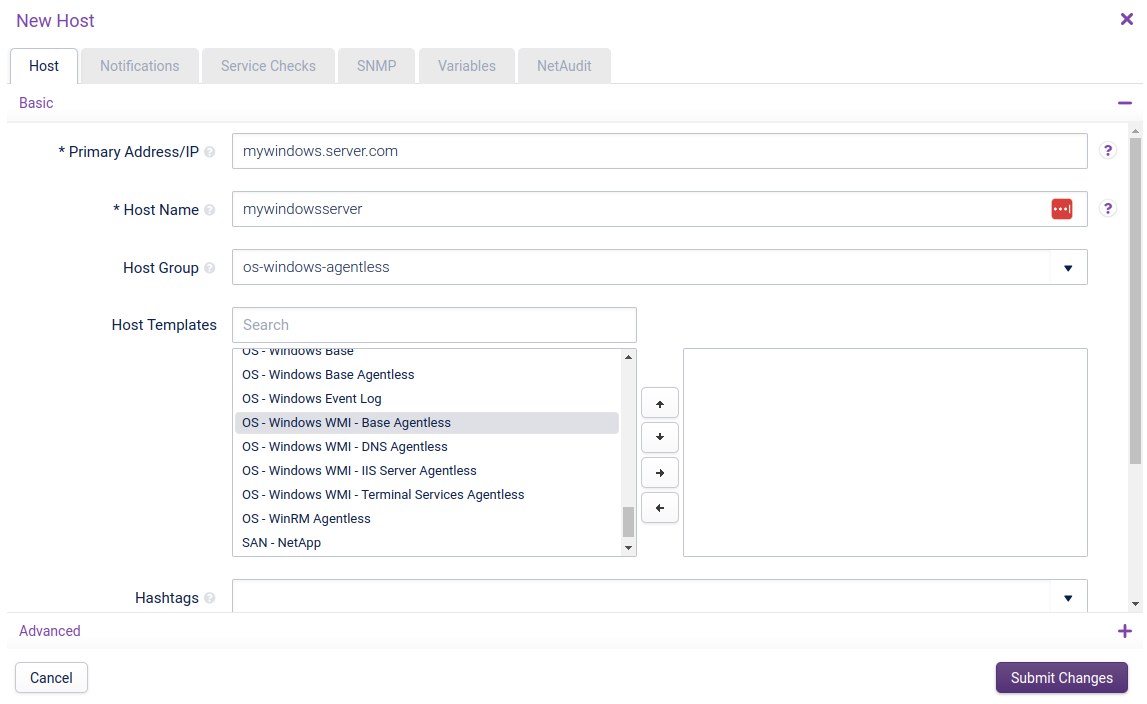
Enter the details of the host, such as hostname/IP, description, and Host Group. If you have more than one Monitoring Cluster, the option to choose which one is monitoring the host will be present as well.
-
Select which Opsview Host Templates you want to use when monitoring Windows servers via WMI:
- OS - Windows WMI - Base Agentless — monitor basics such as CPU, memory, and disk,. There is a variable named WINPROCESS that must be added if you want to monitor per process CPU or memory usage. You can add multiple attributes to spawn multiple checks, for example, 4 WMIPROCESS variables will add 8 service checks, 2 for each.
- OS - Windows WMI - DNS Agentless — DNS service checks for A and CNAME records.
- OS - Windows WMI - IIS Server Agentless — IIS Server service checks, such as transfer stats, user stats, and web server connections.
- OS - Windows WMI - Terminal Services Agentless — Terminal services checks, such as number of sessions active.
-
Choose from these Host Templates using the selector, and then click the right arrow to add them to your host.
-
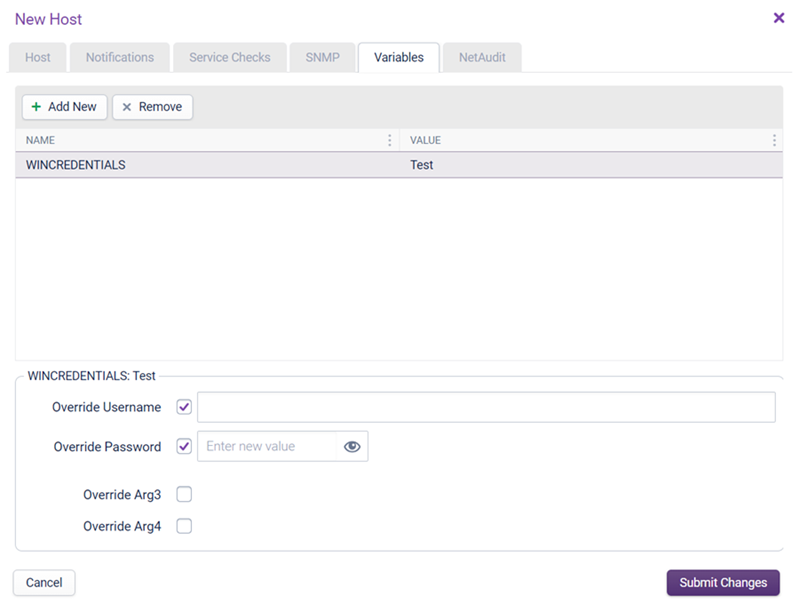
When adding a host, you can also select additional options such as SNMP or notifications (what you want to be notified about for this host). The most important part of this process is the Variables tab.
-
On the Variables tab, click Add New.
-
Type
WINCREDENTIALSin the Name field or select it from the dropdown menu. Give a name or description in its corresponding Value field. -
Once you click Save, you will see a list of checkboxes for the arguments that can be assigned to the variable.
-
Select the boxes next to the overrides for username and password, and then enter their respective values to allow Opsview Monitor to connect to your host:
- Override Username — enter your username, for example, Administrator.
- Override Password — enter your password.
-
Click Submit Changes to complete the process of adding a new host.
Now Apply Changes to reload the Opsview Monitor configuration and begin monitoring the host.
-
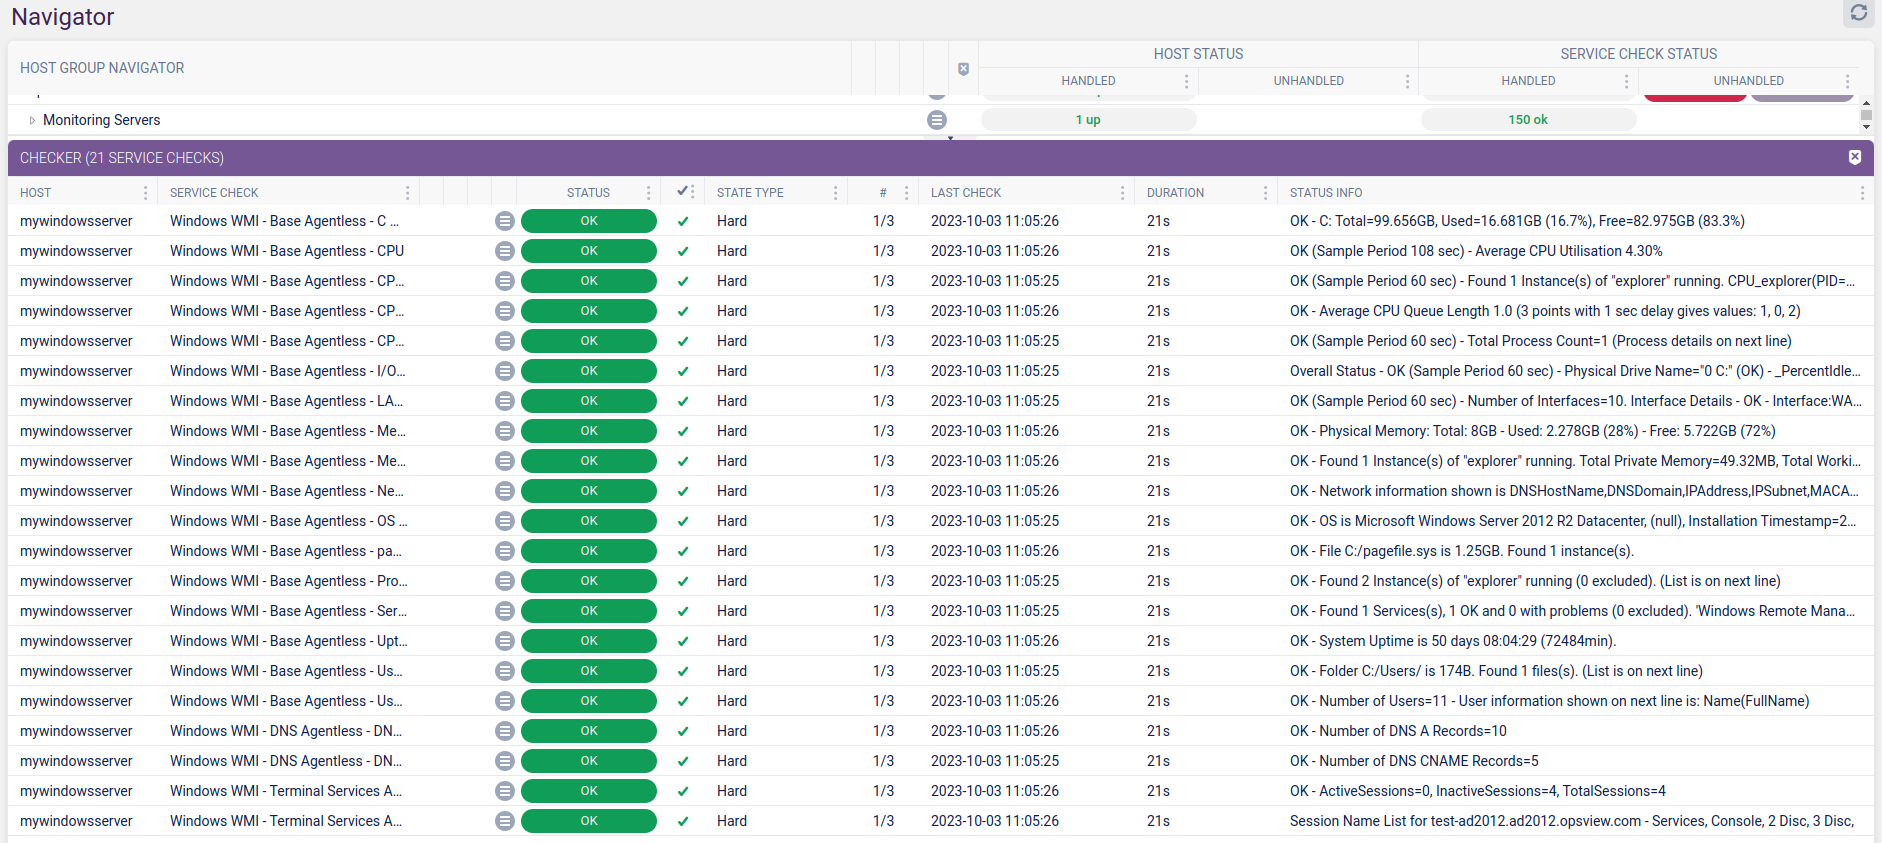
After the reload, navigate to Configuration > Host Groups, Hosts and Services. Then expand the Host Group for the host you created, and then check the checkbox.
Now you can start adding more Windows hosts via WMI, create dashboards to visualize the collected data, and schedule reports to track SLA performance.